|
The “Get a Photo” menu
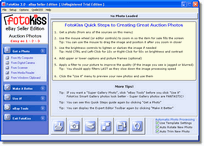 FotoKiss uses a combination of a XP style menu (left side of the screen) and an lower Task toolbar (or optional “Expert Toolbar”) along the bottom of the screen) to meet the needs of both new users and those who are more experienced. FotoKiss uses a combination of a XP style menu (left side of the screen) and an lower Task toolbar (or optional “Expert Toolbar”) along the bottom of the screen) to meet the needs of both new users and those who are more experienced.
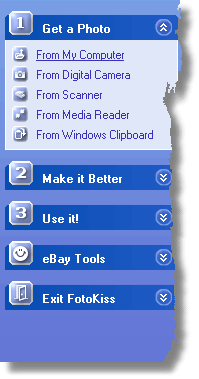 The XP style menu is very verbose and nontechnical while the Task Toolbar uses icons with no text that are easy to see and identify. The XP style menu is very verbose and nontechnical while the Task Toolbar uses icons with no text that are easy to see and identify.
New users find it easy to use FotoKiss with the XP menu because they do not have to refer to the help files.
When you click a section header in the XP menu (such as “Get a Photo”) the items of the menu are displayed with a small icon and text to describe them.
If the “Expert Toolbar” selection is enabled, when you click the section header (Such as “Get a Photo”, “Make it Better” or “Use it!”, you will see a toolbar like this:

Experienced users appreciate the Expert menu since it allows them to make quick selections without opening and closing the XP menu.
Bridging the gap between a new user and an experienced user
The best example of using the Expert Toolbar is in the Make it Better section of FotoKiss. When a user clicks a XP menu option (such as “Zoom In or Out”) they see a large button toolbar on the bottom of the screen that is easy to read - easy to understand. It looks like this:

If the user clicks the “Make it Better” menu header or presses ALT+X, then the Expert Toolbar for this section is restored. It looks like this:

You can see the difference in the screens in these two examples:
The “Make it Better” menu (Expert Toolbar Turned Off)
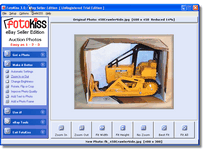 The Make it Better section makes it easy for you to see how FotoKiss combines an easy to use XP style menu with an optional expert Toolbar. The Make it Better section makes it easy for you to see how FotoKiss combines an easy to use XP style menu with an optional expert Toolbar.
In this screen shot, the user has clicked the “Zoom In or Out” option on the XP menu (left) and the large labeled zoom control buttons are displayed on the bottom. A similar set of large easy to read buttons are displayed when any of the XP menu items are selected
The “Make it Better” menu (Expert Toolbar Turned On)
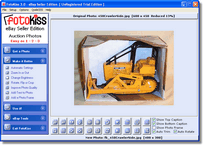
In this screen shot you can see the “Expert Toolbar” for the Make it Better section of FotoKiss.
The expert menu allows you to access ALL of the controls in this section of the program without clicking the XP menu!
Hot Tip! You can switch between the Expert Toolbar and regular toolbar and XP menu combination at any time by clicking an XP menu item (this displays the related large button XP toolbar) and clicking the “Make it Better” button of the XP header to restore the Expert Toolbar.
The “Use it” menu
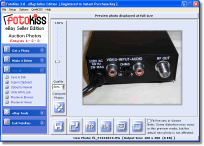
When you click on the “Use it” menu header, FotoKiss creates the entire matching photo set and it is ready to use!
New in version 3.1
You can change the quality level (and therefore the photo size) of each photo - or keep the same setting for all photos.
FotoKiss can create 10 copies of your photo (at different quality settings from 100% down to 10%) and display them in your web browser at the click of a button. This makes it easy for you to compare quality settings and select the one that is right for your particular photo. Once again - FotoKiss keeps it simple!
|